
Posted by Brian Keeney on Aug 2nd 2022
Our Favorite Basic Optics Setup for Modern Fighting AKs
One of the most common questions we get is how to set up sights and optics on the MERC freefloat handguard. This is understandable-- where there used to be very few options, now you can imagine throwing just about anything on there. I'll deal with Low Power Variable Optics (LPVO) and night vision in separate posts. This setup will cover the basic martial configuration of the gun.
Basic Principles
It's useful to think about what's important before beginning.
- All Optics Fail. All of them. If you don't believe me, put some mud on your lens. Now that we've got that out of the way, it means that we need irons.
- Red dots make life better. A lot better. They do present problems for older folks with astigmatism. This will cause the dot to look blurry, starry, figure eight shaped, or slanted. Using the small aperture of our irons will correct this when you need to make accurate shots. To fix the malady of point 1 you'll want to make sure that you have a quick release mount in case of fogging, breakage, or mudding of your optic.
- Cowitness is a thing. Cowitness is where the iron zero is located in the viewing port of the optic. If it's dead in the middle that's a 50% cowitness. If it's in the lower third of the window, that's a lower 1/3 cowitness. Our preference is for something like a 30-40% cowitness, chiefly for the astigmatism correction detailed in item 2.
- Good Enough is Perfect. Don't get too wrapped around the axle with research. If you go with the recipe below you're very likely to be happy with the setup.
The Recipe
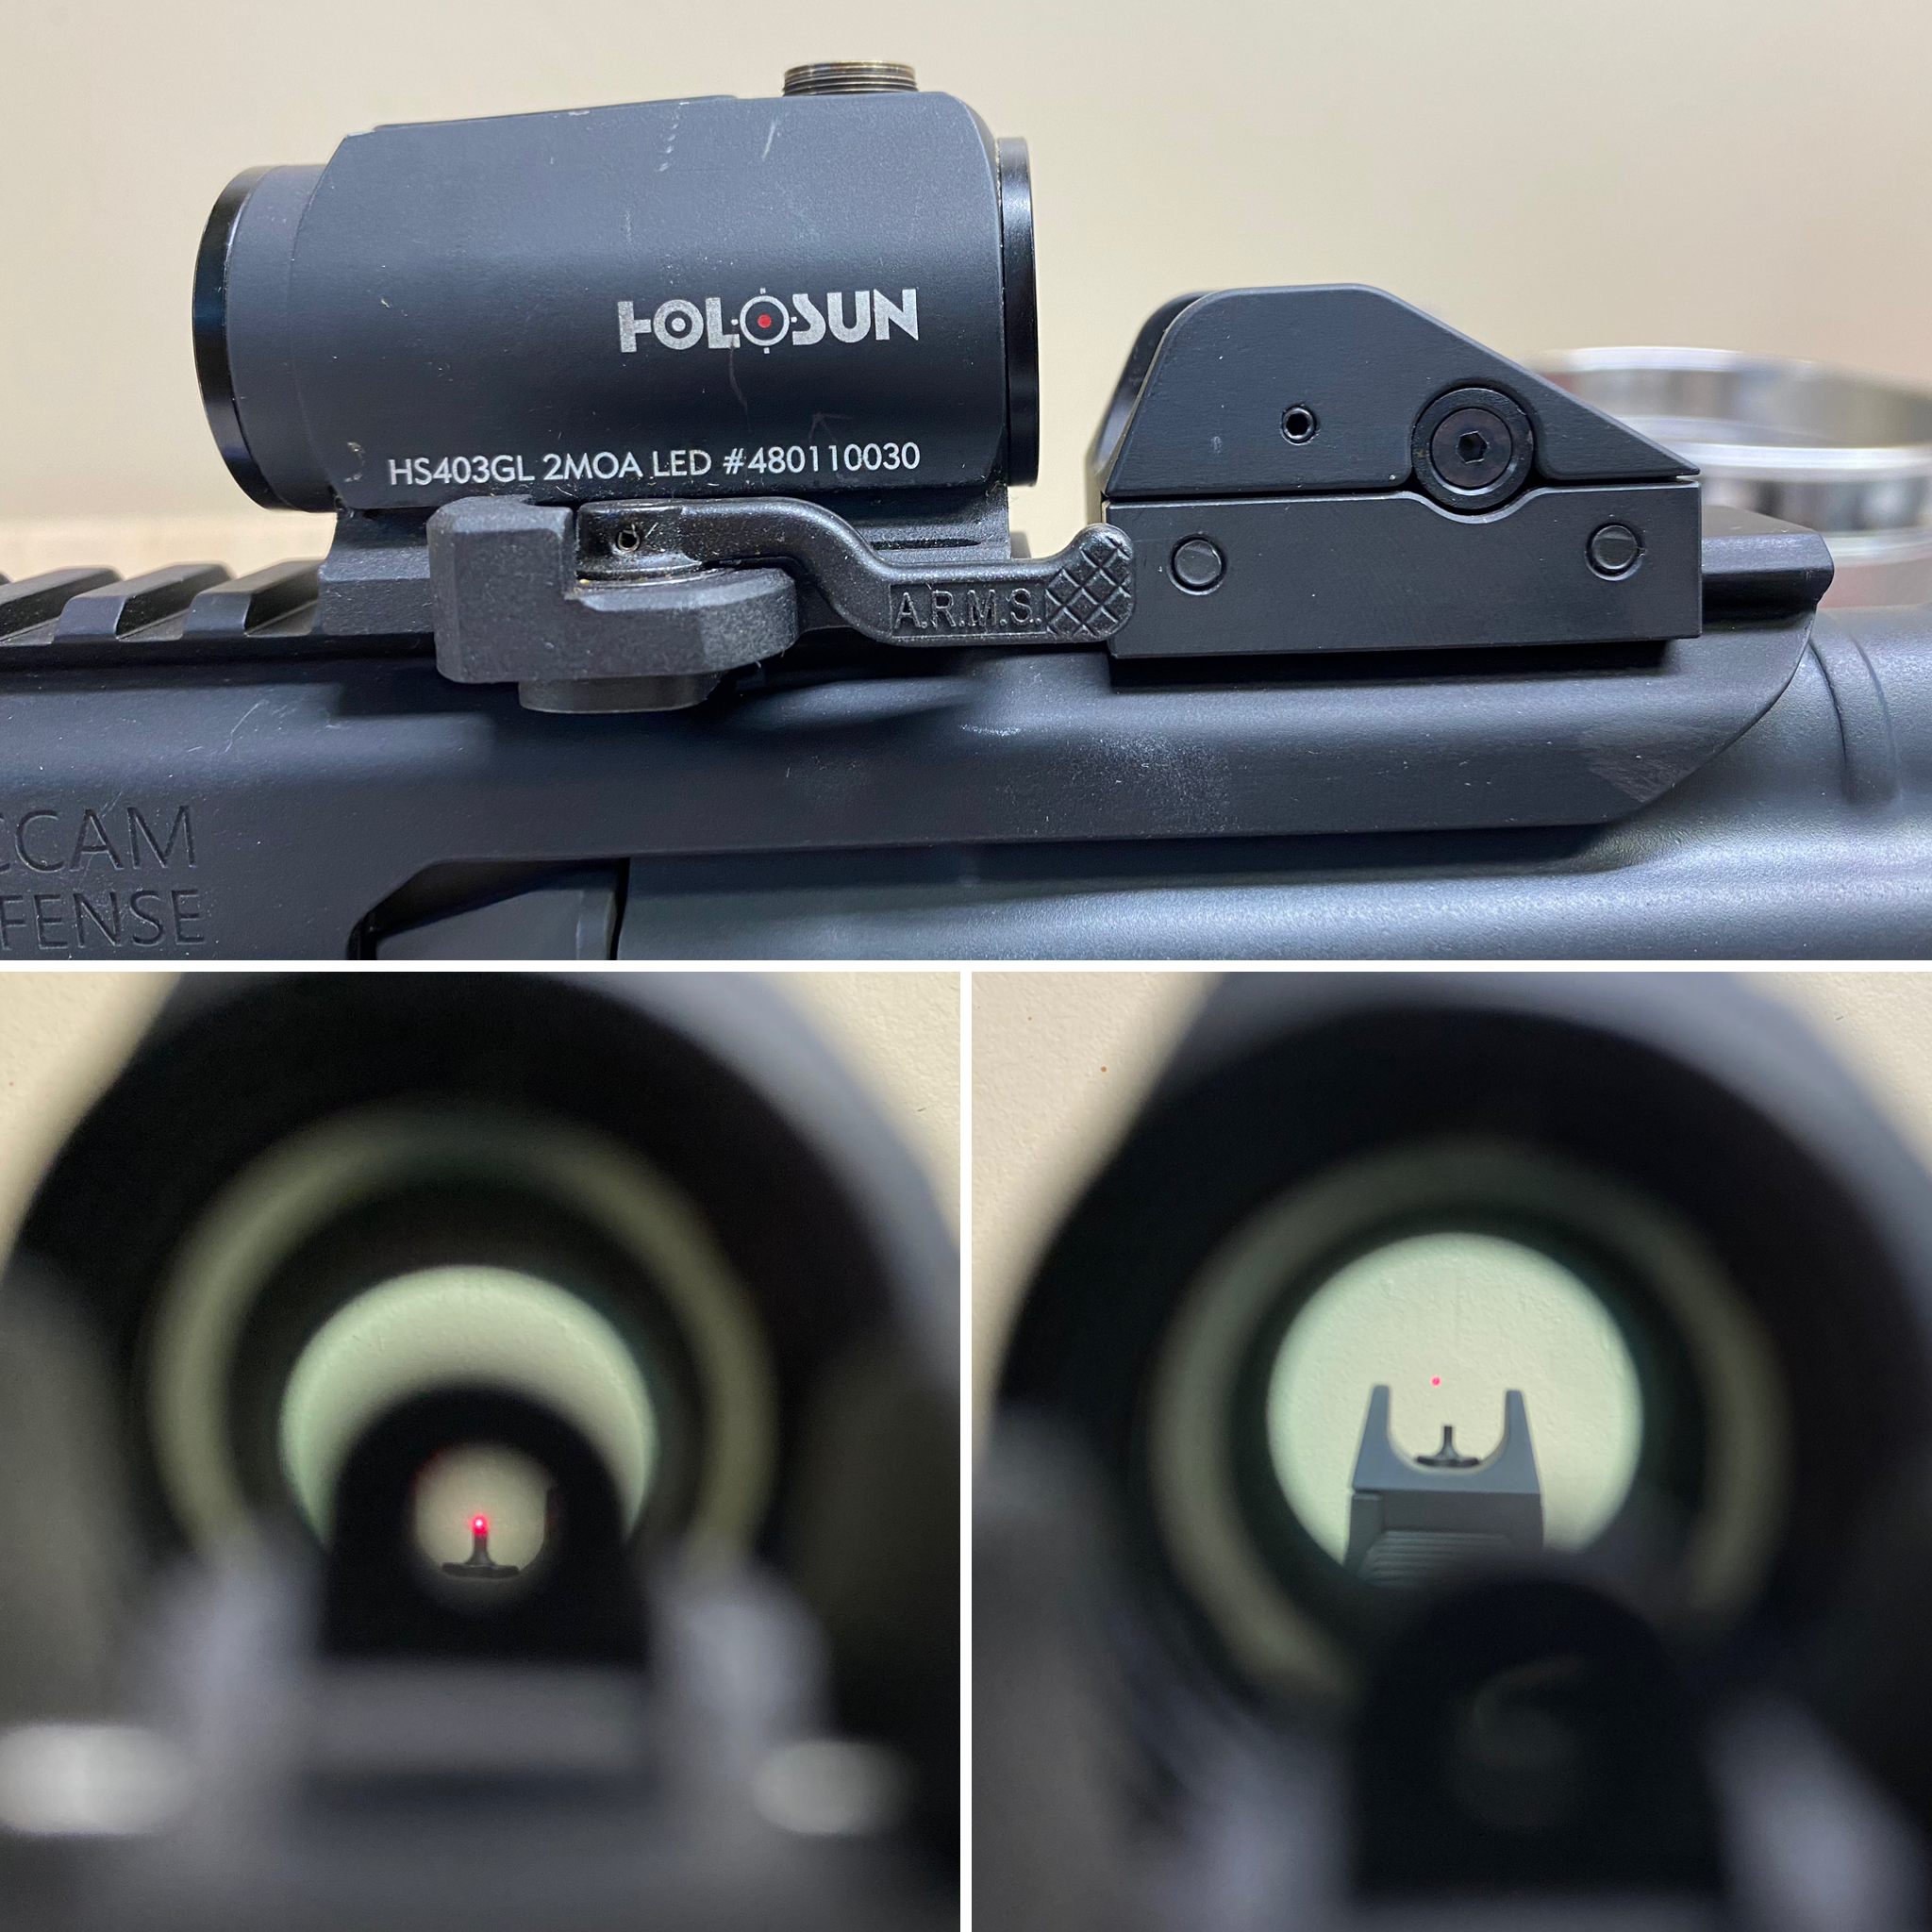
- PH-2 IRON SIGHTS: We make what we think is a very fine set of sights, the PH-2 (LINK). These irons will work from 0-200m with very little issue. We routinely make sub-moa groups with them. They sit such that the height of the sight over the bore of the barrel is about 2.5 inches.
- ARMS #31 LOW MOUNT: There are a bunch of great QD optics mounts out there, but in our humble opinion the ARMS blows the doors off all the rest. We've never broken one, they're made in America, and they're as low as you can get with an aimpoint clone. Oh-- and you can actually remove one single handed while you're still runing the gun. That's a big deal. Optics Planet Link HERE.
- Holosun HS403B or Aimpoint T2: If you have money to burn, get an Aimpoint T2. If you don't, get a Holosun 403B. They're great. We've never broken one and they hold zero well.
Where and How to Mount your solution
The following text requires the use of thread locking compound (Loctite). For a full treatment of threadlocking, see this blog article: ARTICLE: HOW TO LOCTITE
Most folks will want to mount the front sight as far forward as possible, the rear sight as far to the rear as possible, and the red dot just in front of the rear sight. The red dot position in front of the rear sight allows use of the smallest diopter for astigmatism correction. The sights are also as far apart as possible, thus effectively making them "more accurate".
Loctite the mount to the red dot body by using Loctite 243 or whatever blue thread locker you have available. Very light torque is required for all of these screws. If you have an inch pound torque screwdriver, your going to be in the neighborhood of 5-15 inch-pounds. If you don't, use enough torque to seat the screw but not so much that you start stretching it.
Loctite the screws for the sights and loosely attach the parts on the 1913 (Picatinny) rail. When you're close to coming tight, shove the sights forward while pulling the firearm to the rear. Tighten the screws in this location. This removes the movement that would otherwise occur under repeated recoil, where the gun tries to kick backwards under the sights (Yes, this is a real thing).
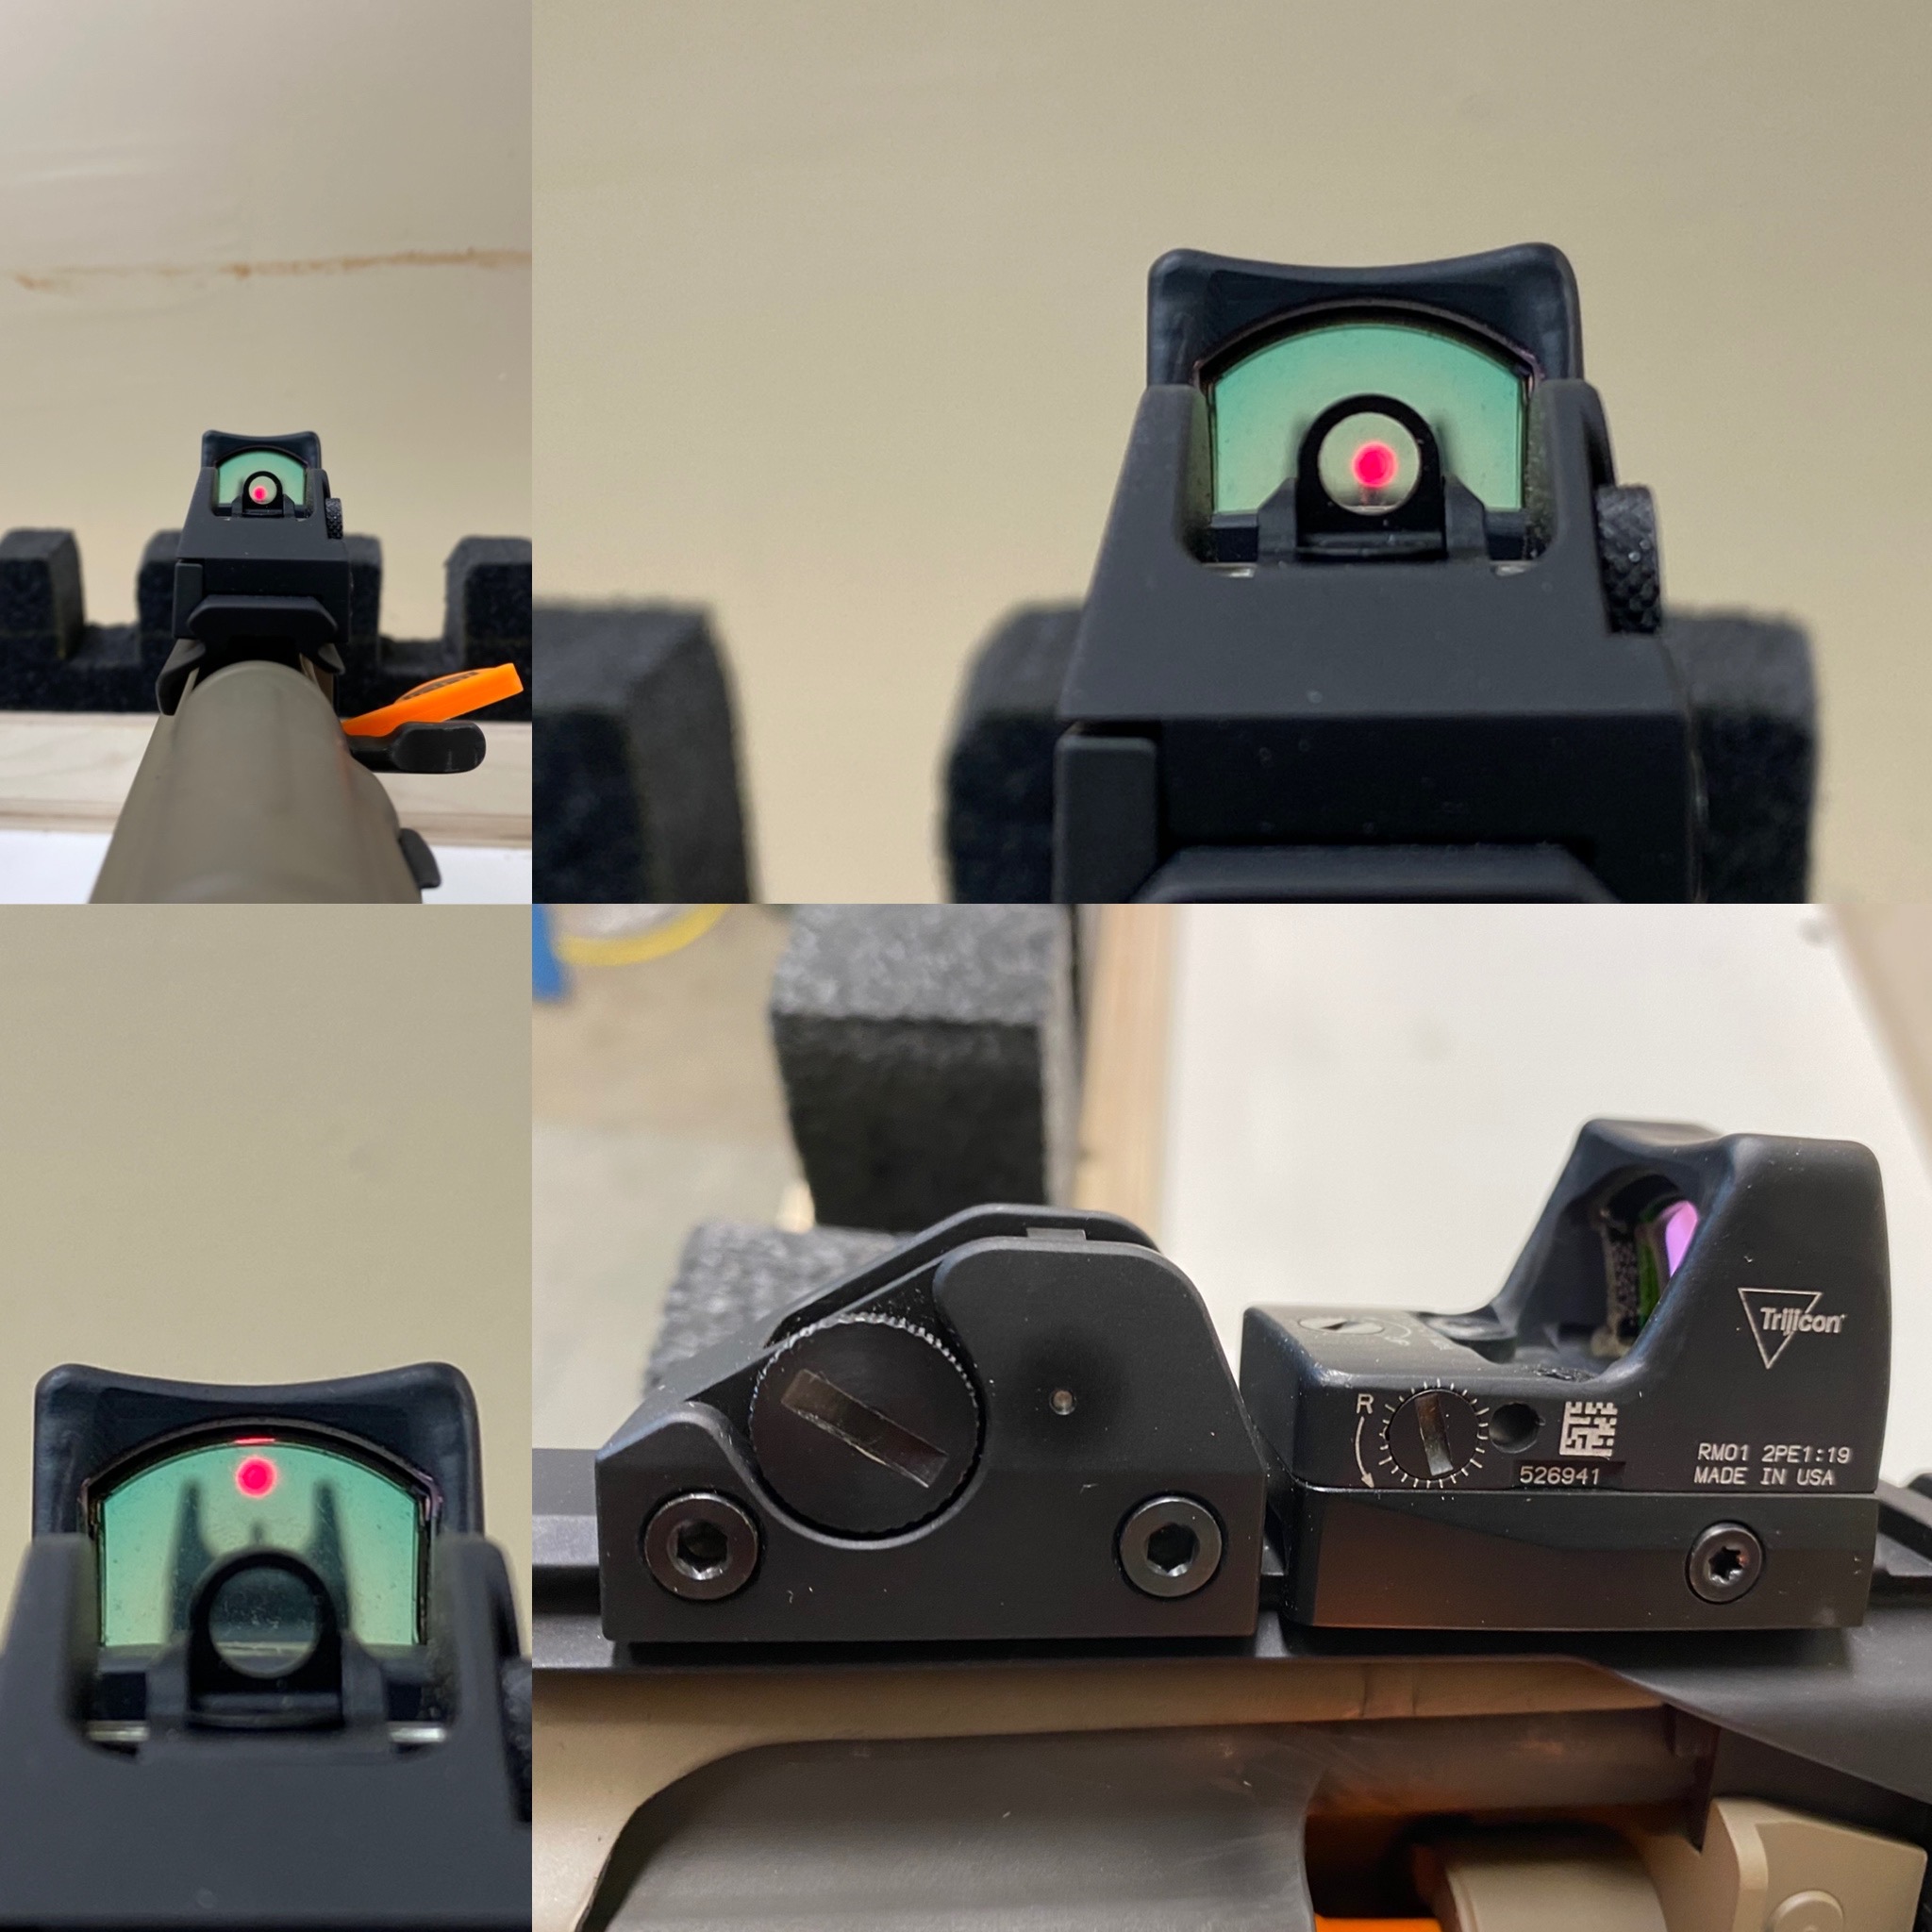
An Alternate Recipe with the Trijicon RMR
Below is an alternate implementation using a Trijicon RMR and low mount. One downside of this particular implementation is the lack of a QD release on the RMR.
Conclusion
I hope this article has been helpful in understanding some of the principles and practical steps in implementing a sighting system on a modern Kalashnikov. If you have any further questions about our products and applications, please email us at admin@occamdefense.com. Thank you for your attention!